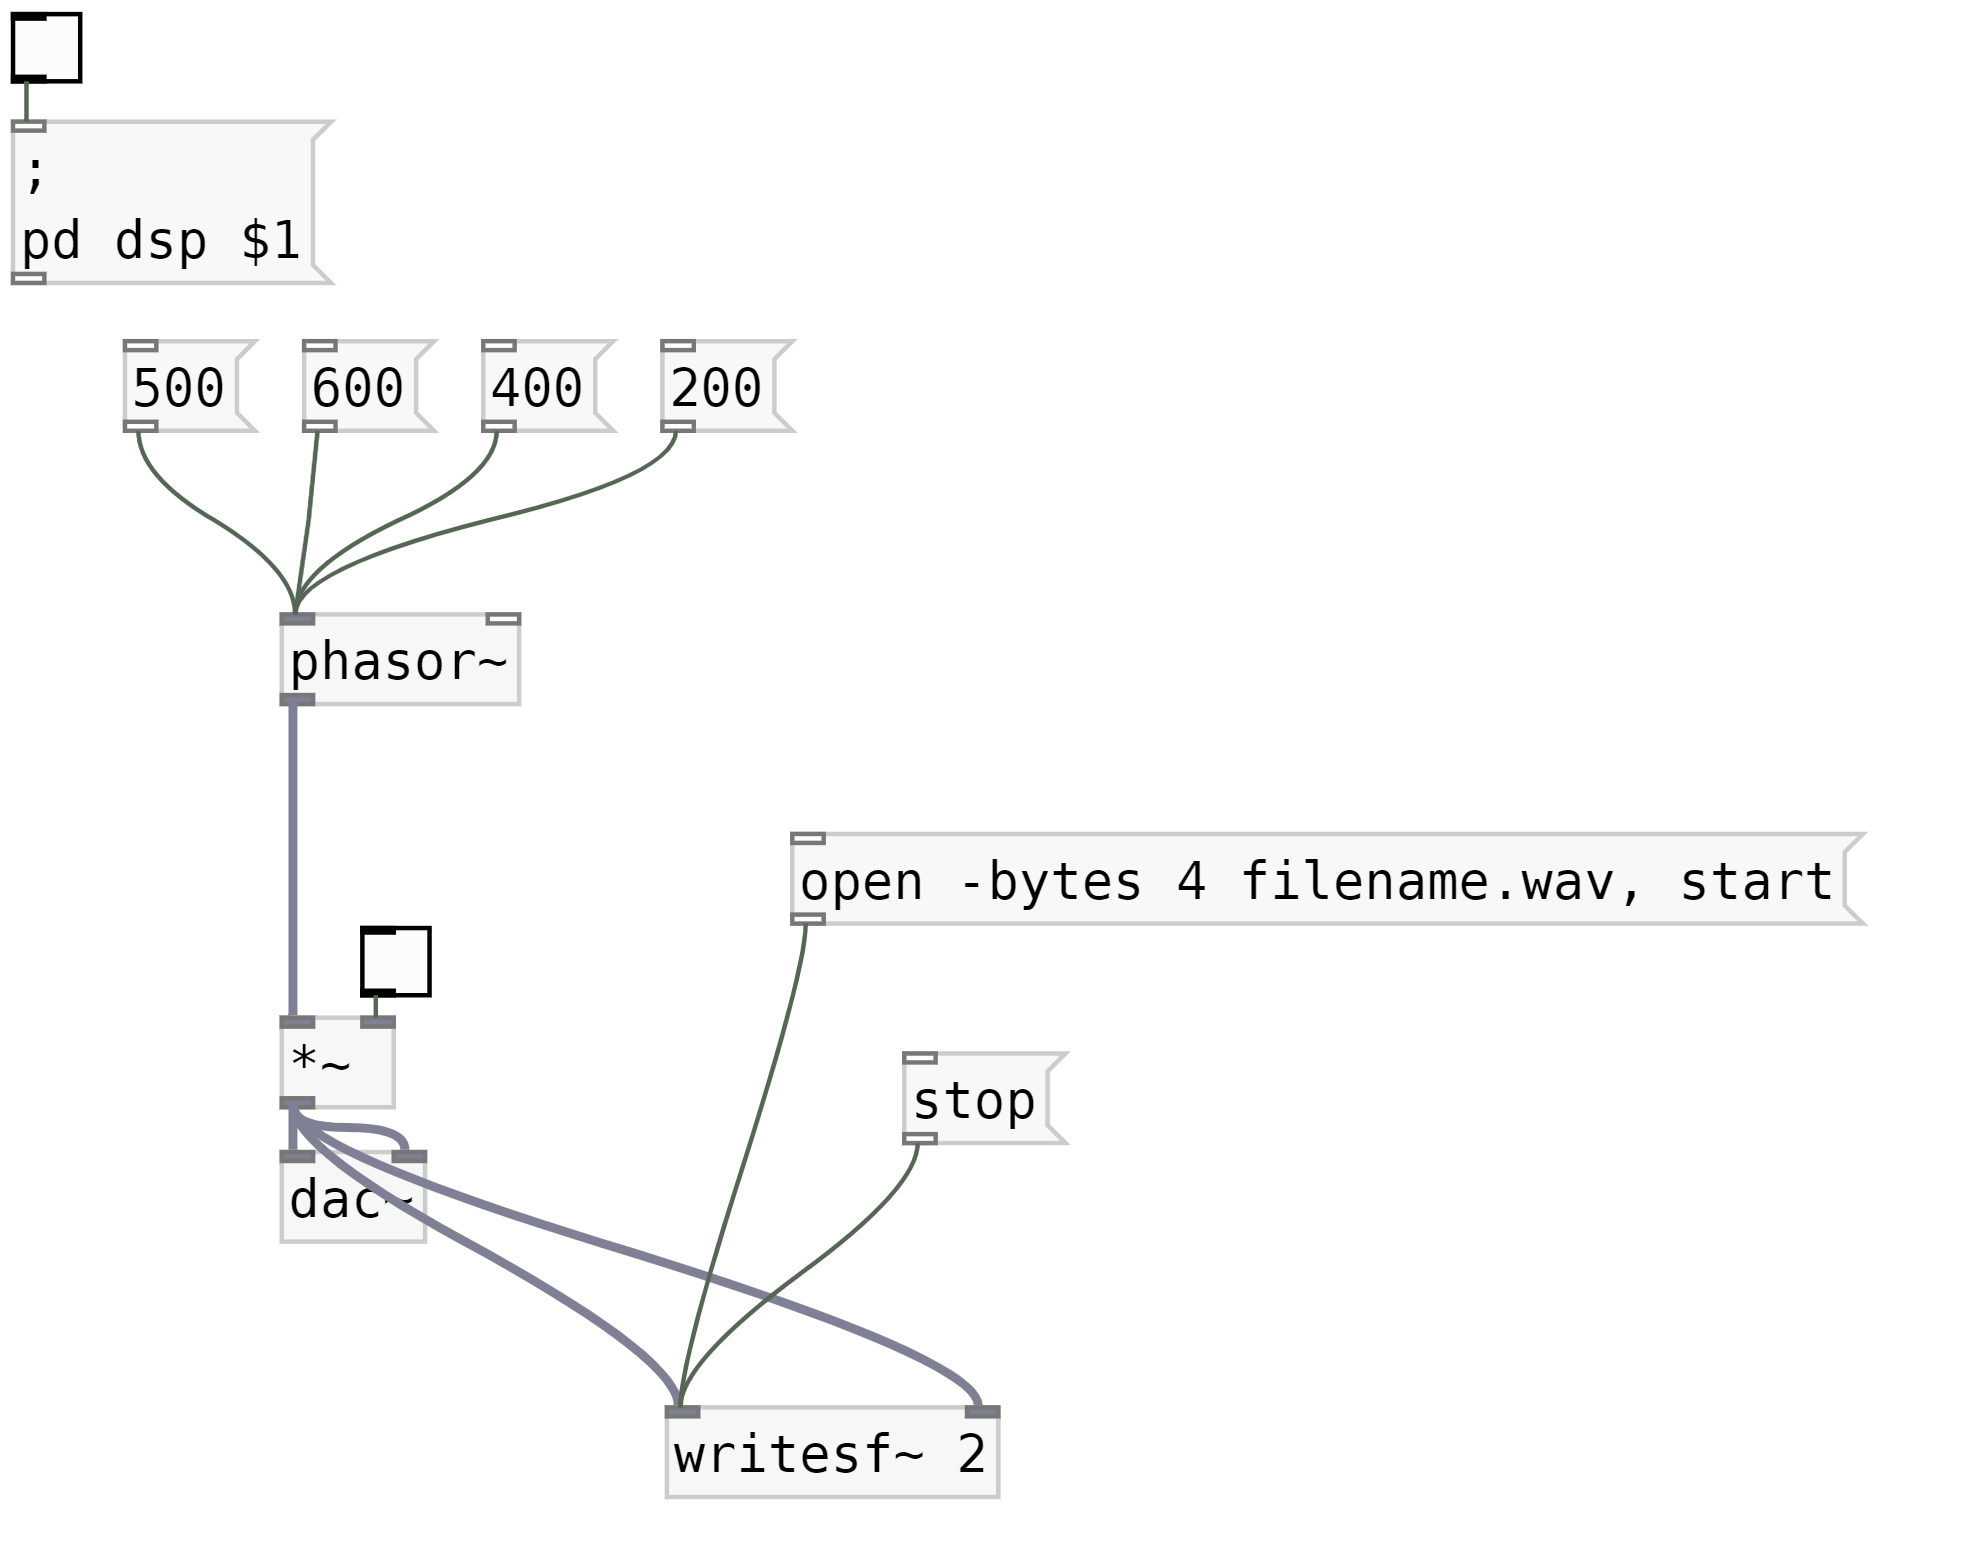
5 step process for recording. 1. Recording sound must add the object [writesf~].
2. Add two messages open and stop to the first inlet (the furthest left) of [writesf~].
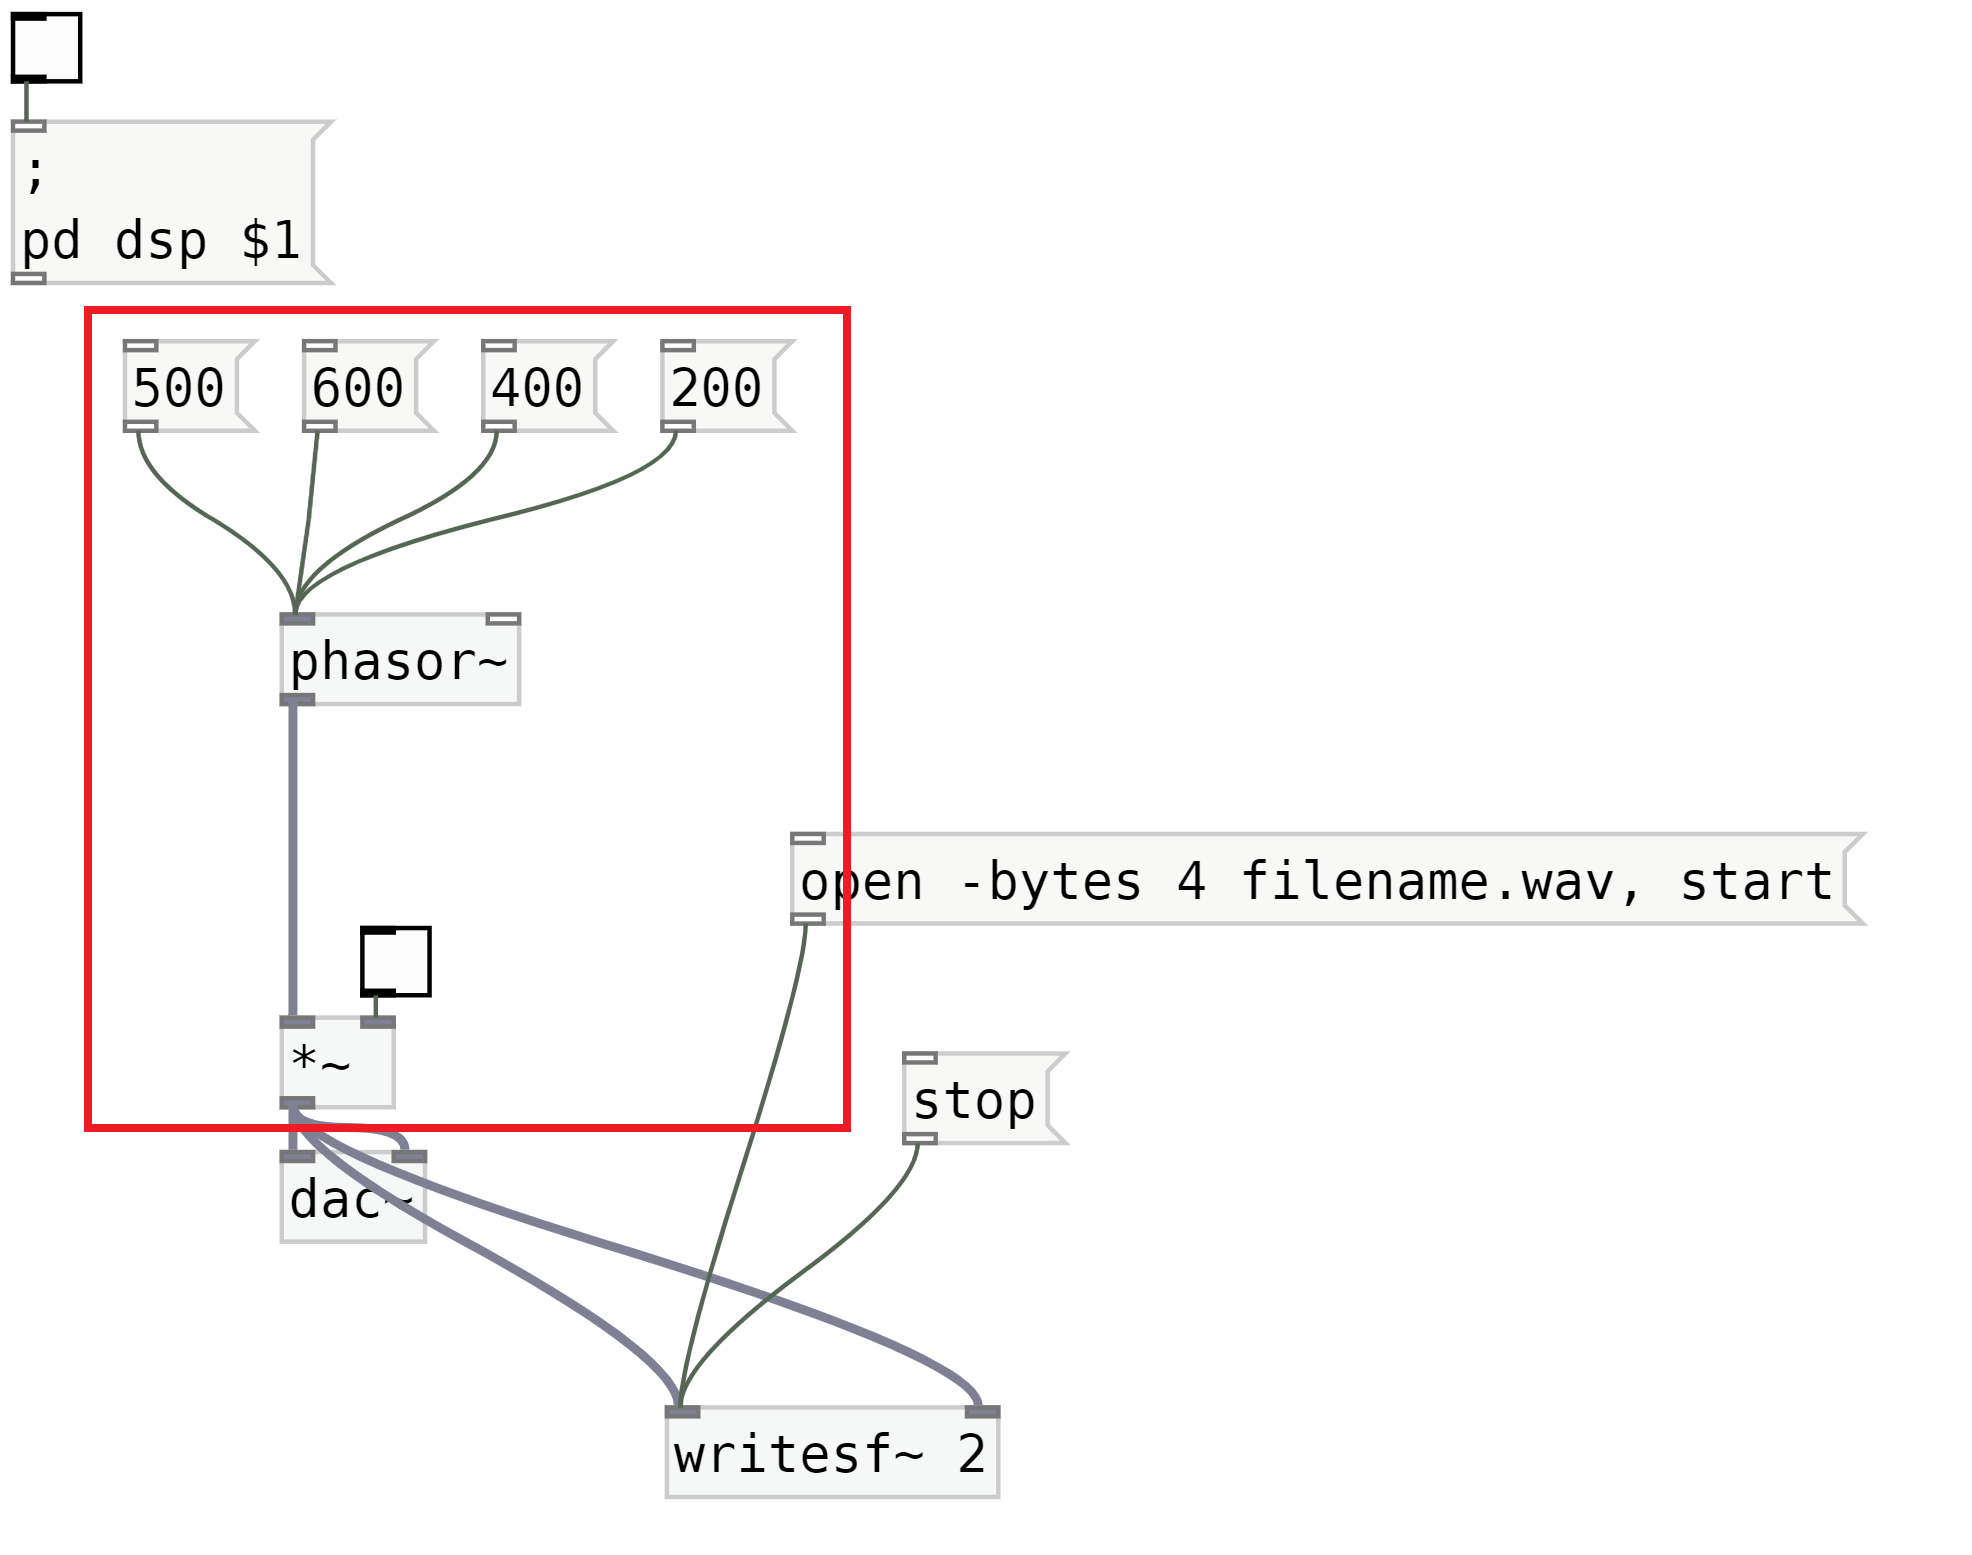
3. Firstly, add a 2 behind or beside [writesf~], like this [writesf~ 2] (the two opens up two inlets on [writesf~ 2], allowing stereo recording). Then connect the sound/audio generator outlets to both the inlets of [writesf~ 2].
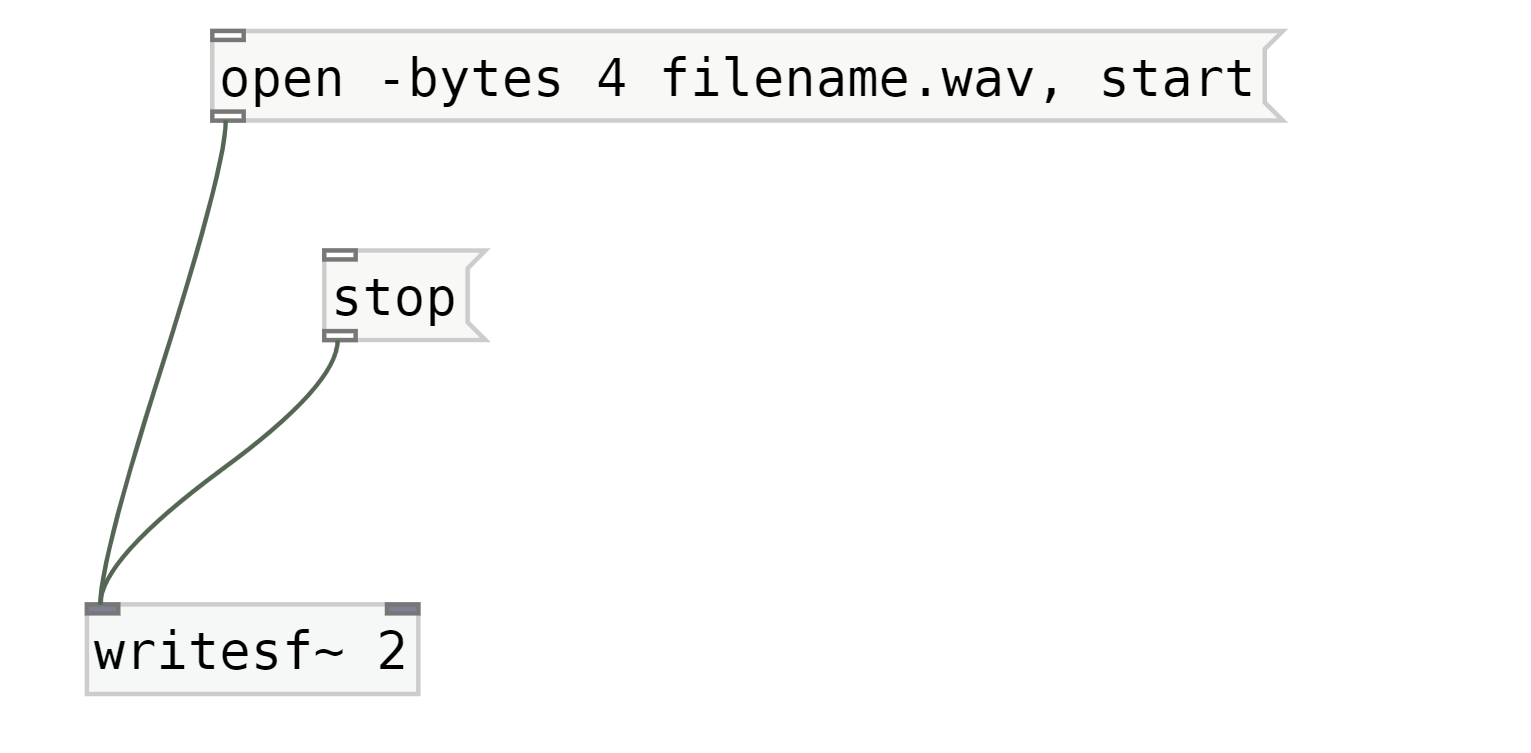
4. Next is to click on [open -bytes 4 filename.wav, start( to begin recording.
5. Final step is to click on [stop( to end the recording and finailize the soundfile.
You can find more details of these steps below.1. Recording sound must add the object [writesf~] You must have something that generates sound and then its outlet must be connected to [writesf~] object. Lets say you already have the music part done so lets add [writesf~] object.
2. Add two messages open and stop to the first inlet (the furthest left) of [writesf~] Firstly, add a 2 behind or beside [writesf~], like this [writesf~ 2] (the two opens up two inlets on [writesf~ 2], allowing stereo recording). Add two messages open and stop to the inlet of [writesf~ 2] to begin the recording process. You must add additional lines to open to intialize the recording. In the message of open please type out open -bytes 4 filename.wav, start. This will generate a .wav file with the filename, filename.wav. What does bytes do? bytes 4 will create a 32-bit flaoating-point soundfile. You can add without bytes and another way is bytes 3, which creates a 24-bit soundfile.
3. Firstly, add a 2 behind or beside [writesf~], like this [writesf~ 2] (the two opens up two inlets on [writesf~ 2], allowing stereo recording). Then connect the sound/audio generator outlets to both the inlets of [writesf~ 2]. Finally connect the sound/audio generator outlets to both the inlets of [writesf~ 2]. (CONNECTING BOTH creates a stereo track). In this image I have boxed out the section that generates sounds/audio/music. If you noticed at [*~] the outlet is connected to both of the [writesf~ 2] inlets.
4. Next is to click on [open -bytes 4 filename.wav, start( to begin recording5. Final step is to click on [stop( to end the recording and finailize the soundfile
this is a dummy test text. this is a dummy test text. this is a dummy test text. this is a dummy test text. this is a dummy test text. this is a dsummy test text. this is a dummy test text. this is a dummy test text. this is a dummy test text. this is a dummy test text. this is a dummy test text. this is a dummy test text.
 2. Add two messages open and stop to the first inlet (the furthest left) of [writesf~]
 3. Firstly, add a 2 behind or beside [writesf~], like this [writesf~ 2] (the two opens up two inlets on [writesf~ 2], allowing stereo recording). Then connect the sound/audio generator outlets to both the inlets of [writesf~ 2].
 4. Next is to click on [open -bytes 4 filename.wav, start( to begin recording
5. Final step is to click on [stop( to end the recording and finailize the soundfile
4. Next is to click on [open -bytes 4 filename.wav, start( to begin recording
5. Final step is to click on [stop( to end the recording and finailize the soundfile